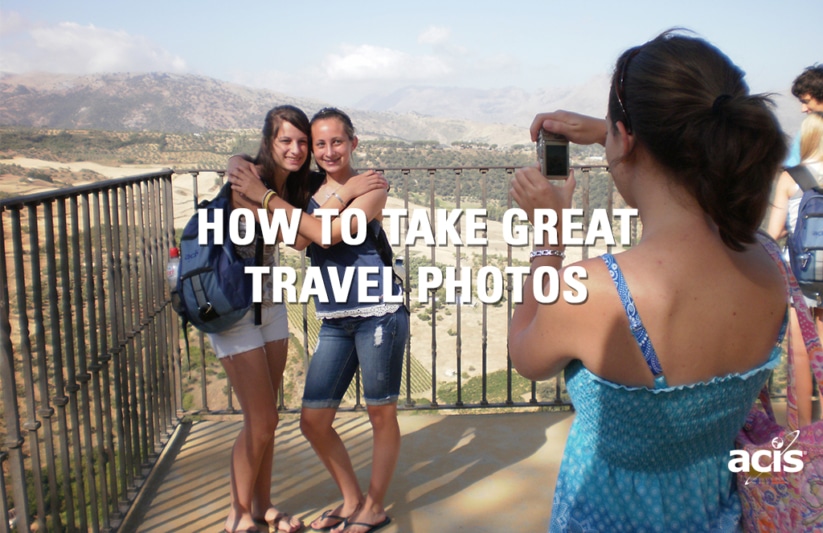
How to Take Great Travel Photos – A Professional Photographer’s Guide
This guest post was contributed by Marc Goodwin, an architectural photographer, digital media instructor and ACIS tour manager from 2003-2011. He was born in London and has spent several years in Spain, Italy, and America. He has a BA in English and Spanish literature from UCSD and an MA in Digital Imaging from Goldsmiths College, University of London.
With a few essentials in mind, a critical eye, and a little practice, anyone can take a great picture. The following basics will help you go from being “a person holding a camera” to a photographer.
Framing
The world is made up of geometry, especially when you squash it into 2 dimensions, so be on the look-out for diagonal lines. Those lines (like those of a road leading off into the distance) will direct a person’s eye to your subject. Keep your eye open for triangles and ‘s’ curves, too. They’re everywhere once you know to look for them. Try to line up these lines with the four corners of your photograph, wherever possible.
Lighting
Your camera’s light meter takes an average reading of the whole scene and sets the exposure. This is fine until you are shooting someone with the sun behind them. If that is the case, you need to get up close to make sure the camera reads the light in their faces. The same is true if you are shooting a group in the shade but have a bright sky in the picture. If your camera has a manual setting, play around with that too, lowering the aperture number to let in more light. You can do the same with shutter speed, just remember that you shouldn’t hold the camera at any slower shutter speed than 1/60 second.
Steady Camera
In a darkened room, at night, or any time you have little available light, your camera will automatically take slower speed pictures to compensate. This means you cannot hand hold the camera and expect to get anything but camera shake. If you don’t have a tripod, put the camera on a table or shelf or even on the ground, and if you have a self-timer use it for even sharper pictures.
The Decisive Moment
Most people miss a great shot by simply taking too long to press the shutter. Whether it’s a person’s facial expression going from sincere to posed or an action shot you just missed, taking too long to take a picture is the worst and most common mistake you see out there. Shoot immediately once you have your picture focused and framed, then take more pictures until you’re sure you’ve got the one you want. But don’t just stand there looking through the lens!
Film is cheap, digital is cheaper: shoot lots! Every time you see something you like, you should press the shutter. Have your camera ready and waiting when you are traveling or with people you care about. You can edit your shots after you take them.
Editing
If you shoot as much as you are supposed to, this “postproduction” step becomes as important as the picture taking itself. Go through your shots and eliminate the ones you don’t like. And if you want to get really good, keep a file of these shots together with notes about what went wrong with them and a file of your best pics with notes about what made them really good. This will help you to develop a critical eye and look for the shots you like even before pressing the shutter.
What tips and tricks do you have for taking great travel photos? Let us know in the comments section below!
FREE LESSON PLAN
Teaching with Photography
4 Photo based activities to do with your students and enhance your curriculum.
Guest Blogger